
Skip to content
Show3D
  • Community
  • Pricing
Search scenes
Create
OverviewDocumentationTutorials & coursesSearch Learn
  • Overview
  • Get started with Show3D
  • Modeling tools
    • Modeling examples
  • Materials & textures
  • Agent modeling
    • Connect Codex
  • Asset generation

In this topic

  • Bridge loops
  • Fill a boundary
  • Delete faces
  • Dissolve an edge
  • Merge at center
  • Merge by distance
  • Separate geometry
  • Slide an edge
  • Slide a vertex
  • Recalculate normals
  • Mark sharp edges
  • Smooth shading
Browse documentation
  • Overview
  • Get started with Show3D
  • Modeling tools
    • Modeling examples
  • Materials & textures
  • Agent modeling
    • Connect Codex
  • Asset generation

In this topic

  • Bridge loops
  • Fill a boundary
  • Delete faces
  • Dissolve an edge
  • Merge at center
  • Merge by distance
  • Separate geometry
  • Slide an edge
  • Slide a vertex
  • Recalculate normals
  • Mark sharp edges
  • Smooth shading

Learn

Learn overviewDocumentationTutorials & coursesConnect Codex
XiaohongshuDouyinBilibili

Copyright © 2023 - 2026 Show3D Technology Limited. All rights reserved.

Terms of UsePrivacy Policy
Modeling tools
  1. Learn
  2. Documentation
  3. Modeling tools
  4. Dissolve an edge

Dissolve an edge

Remove an internal edge while preserving the surface. This example merges a flat face pair instead of leaving a hole.

Before you start

Enter Edit Mode and select internal edges, suitable vertices, or adjacent faces that can be simplified. Some boundary and branching selections cannot be dissolved.

Use the operation

Remove unnecessary divisions while retaining a continuous surface.

  1. For a simple example, select an internal edge shared by two faces on a flat patch.
  2. Choose Dissolve from the context menu or Delete menu. Ctrl/Cmd+X is the mesh-edit shortcut.
  3. Inspect the larger resulting face. Undo if the change alters the silhouette, shading, or topology needed for later edits.

Controls and choices

ControlsWhat changes
Selection modeVertex, edge, and face selections produce different simplifications. Use the smallest selection that expresses the intended cleanup.
PlanarityRemoving an edge between non-planar faces can change how the surface is triangulated and shaded.
AvailabilityA disabled command means the selected topology has no supported dissolve result. It is not a reason to replace the action with Delete.

See what changes

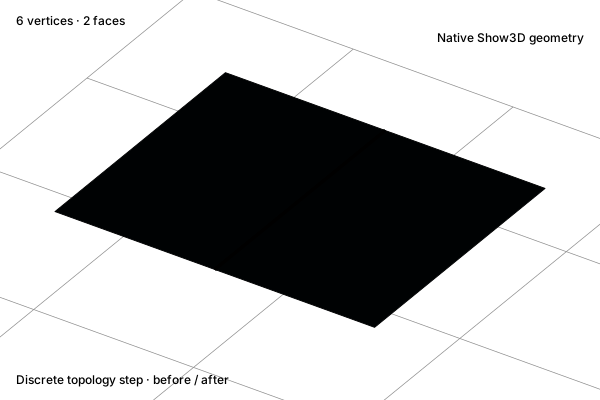
Before

Dissolve an edge: Two coplanar faces

Two coplanar faces

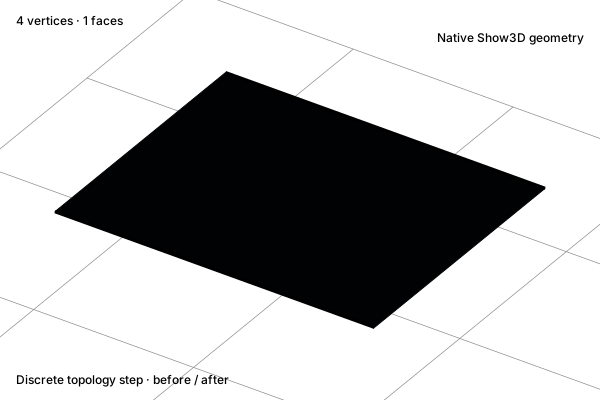
After

Dissolve an edge: One continuous face

One continuous face

Concept illustration. The diagrams explain the operation. Your result depends on the starting geometry and settings.

Check the result

Confirm the surface remains closed and the removed divisions were unnecessary. Keep support loops needed for subdivision or deformation.

Related operations

Delete facesMerge at centerLoop cut

Practice in Show3D

Open the editor and follow the steps with your own scene.
Start modelingModeling essentials

On this page

Before you startUse the operationControls and choicesSee what changesCheck the resultRelated operations